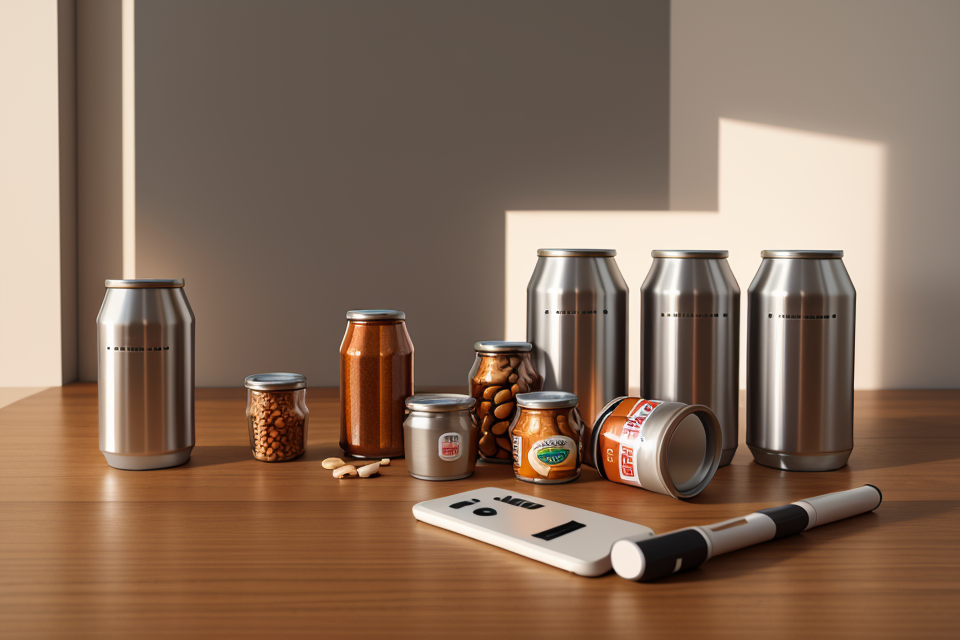
10 Clever Ways to Reuse Empty Peanut Cans
Are you wondering what to do with all those empty peanut cans cluttering up your kitchen? Look no further! We’ve got 10 clever ways to reuse those cans and give them a new lease on life. From crafts to organization, these ideas will help you make the most of your empty peanut cans. So, get ready to turn those empty cans into something amazing!
Turn Empty Peanut Cans into Decorative Candle Holders
Sand down the cans for a smoother finish
Before transforming empty peanut cans into decorative candle holders, it is essential to remove any labels or markings. Once the labels are removed, you can begin sanding down the cans to create a smoother finish. Here are the steps to follow:
- Choose the right sandpaper: To achieve a smooth finish, you will need to use sandpaper with a fine grit. A sandpaper with a grit of 220 or higher is recommended.
- Sand the can evenly: Begin by sanding the top and bottom of the can to remove any sharp edges. Then, sand the sides of the can evenly to create a smooth surface.
- Use a sanding block: A sanding block is an excellent tool to ensure that you are sanding the can evenly. It also helps to prevent sanding marks that can occur when using your hand.
- Remove dust: After sanding, use a soft cloth to remove any dust from the can. This will ensure that the surface is clean and smooth.
- Inspect the can: Once you have finished sanding, inspect the can to ensure that it is smooth and free of any scratches or dents. If necessary, repeat the sanding process until you are satisfied with the results.
By following these steps, you can create a smoother finish on your empty peanut cans, allowing them to serve as beautiful decorative candle holders.
Paint or decorate the cans with patterned or solid colors
To transform empty peanut cans into decorative candle holders, painting or decorating the cans with patterned or solid colors is a simple yet effective approach. Here are some steps to follow:
- Prepare the Cans: Before painting or decorating the cans, it’s essential to clean them thoroughly. Remove any labels or residue, and ensure that the cans are dry and free from dust.
- Choose a Painting or Decorating Technique: There are several ways to paint or decorate the cans. You can use acrylic paint, spray paint, or even fabric paint to create unique designs. If you prefer a more subtle look, solid colors like white, black, or metallic shades can be used.
- Experiment with Patterns: For a more playful and eye-catching design, experiment with different patterns. You can create stripes, polka dots, or even floral patterns using various painting techniques. Alternatively, you can use decals or stencils to achieve a more precise design.
- Add Coatings for a Glossy Finish: To give the cans a glossy finish, apply a clear coat or varnish after the paint has dried. This will not only protect the paint but also add a shiny and appealing look to the candle holders.
- Allow the Cans to Dry: Once you’ve finished painting or decorating the cans, allow them to dry completely before proceeding with the next steps. This will ensure that the paint or decoration adheres properly and doesn’t chip or flake off.
By following these steps, you can transform empty peanut cans into decorative candle holders that add a touch of personality and style to any room.
Fill the cans with wax or other melting point candle wax
When it comes to transforming empty peanut cans into decorative candle holders, filling the cans with wax or other melting point candle wax is a crucial step. Here are some details on how to do it:
First, gather all the materials you will need for this project. In addition to the empty peanut cans, you will need wax or other melting point candle wax, a double boiler or a heat-resistant container, a thermometer, and some wicks.
Next, determine the size of the wicks you will need based on the size of the peanut cans. A good rule of thumb is to use a wick that is at least as tall as the can is wide.
Once you have the wicks, melt the wax in the double boiler or heat-resistant container. The wax should be melted to the temperature recommended for the type of wax you are using. This temperature can typically be found on the packaging or in the product instructions.
Next, carefully insert the wicks into the bottom of the peanut cans. Make sure the wicks are centered and level.
Once the wicks are in place, slowly pour the melted wax into the cans, being careful not to pour it too quickly or too close to the wicks. Pour the wax until it reaches the desired level, taking care to leave enough room at the top for the wax to expand as it cools.
Allow the wax to cool and harden completely before inserting the candles into the cans. Once the wax is fully hardened, the peanut cans can be used as decorative candle holders.
Let the wax solidify and enjoy your new candle holders
After you have poured the melted wax into the empty peanut cans, let it solidify completely. This can take anywhere from 30 minutes to an hour, depending on the temperature and the size of the can. It’s important to wait until the wax has fully hardened before using the candle holders, as the heat from the flame can cause the wax to become liquid and drip, potentially causing a fire hazard.
Once the wax has solidified, you can enjoy your new candle holders. They make great decorative pieces for your home and can be used to hold tea lights or larger candles. The peanut cans add a unique and rustic touch to the candle holders, making them stand out from store-bought versions. You can also customize the look of the candle holders by painting or decorating the peanut cans before pouring the wax.
In addition to being a creative and eco-friendly way to reuse empty peanut cans, making candle holders from them is also a fun and easy DIY project. It’s a great activity to do with friends or family, and the end result is a beautiful and functional piece that you can enjoy for years to come.
Transform Empty Peanut Cans into Plant Containers
Remove the label from the can
To transform an empty peanut can into a plant container, the first step is to remove the label from the can. Here are the steps to follow:
- Use a pair of scissors or a sharp knife to cut around the label of the peanut can, leaving about an inch of the label attached to the can.
- Carefully peel off the label from the can, being careful not to damage the paint or the metal surface of the can.
- Use a cloth or a paper towel to wipe away any residue or glue that may be left behind from the label.
- Once the label is removed, rinse the can with warm water and dry it thoroughly with a towel.
- Now the peanut can is ready to be transformed into a plant container. Simply plant your favorite herb or vegetable seedling into the can and water as needed.
Cut a small hole on the bottom of the can
Transforming empty peanut cans into plant containers is a great way to repurpose them and add a touch of nature to your home. One of the most crucial steps in this process is to cut a small hole on the bottom of the can.
The hole should be small enough to prevent soil from falling out but large enough to allow water to drain properly. It’s essential to position the hole at the bottom of the can so that the soil and plant roots can easily access water.
To cut the hole, you can use a sharp pair of scissors or a small knife. It’s recommended to use a ruler or a compass to ensure that the hole is centered and of the correct size. Once the hole is cut, you can proceed to fill the can with soil and plant your chosen plant.
Additionally, you can use the same method to create drainage holes in the bottom of the can if there are no pre-existing holes. This will ensure that excess water can escape, preventing waterlogging and root rot.
Overall, cutting a small hole on the bottom of the can is a crucial step in transforming empty peanut cans into plant containers. It allows for proper drainage and ensures that your plant can thrive in its new home.
Fill the can with soil and plant seeds or seedlings
One of the most creative ways to reuse empty peanut cans is to transform them into plant containers. This is an excellent way to repurpose the cans while also helping to promote greenery in your home or garden. Here’s how you can do it:
- Remove the label: Before filling the can with soil and seeds, it’s essential to remove the label. You can do this by gently peeling it off or using a pair of scissors to cut it off.
- Clean the can: After removing the label, it’s crucial to clean the can thoroughly. You can use soap and water to clean it or run it through a dishwasher cycle. It’s essential to ensure that the can is free from any residue or dirt.
- Punch drainage holes: Peanut cans don’t have drainage holes, so you’ll need to punch some holes in the bottom of the can. You can use a nail or a sharp object to do this. Make sure the holes are big enough for water to drain but small enough to prevent soil from falling out.
- Fill the can with soil: Once the can is clean and has drainage holes, you can fill it with soil. You can use a potting mix or create your own soil mixture by combining compost, peat moss, and perlite.
- Plant seeds or seedlings: After filling the can with soil, you can plant seeds or seedlings in it. Make sure to follow the instructions on the seed packet or seedling container to ensure proper planting.
- Water the plants: Once the seeds or seedlings are planted, water them thoroughly. Make sure to keep the soil moist but not waterlogged.
- Provide sunlight: Peanut cans can make excellent containers for sun-loving plants. Place the can in a sunny spot, and make sure to rotate it occasionally to ensure even sun exposure.
By following these steps, you can transform empty peanut cans into attractive plant containers that add greenery to your home or garden.
Water the soil and watch your plants grow
Repurposing empty peanut cans as plant containers is a fantastic way to recycle and create a functional home for your greenery. After cleaning and drying the cans, fill them with soil and add your chosen plants. Be sure to select plants that are suitable for the environment you plan to keep them in, such as indoors or outdoors.
Watering the soil is a crucial step in the growth of your plants. To ensure optimal growth, use a watering can or a spray bottle to water the soil directly, taking care not to overwater the plants. Overwatering can lead to root rot and other issues, so it’s essential to allow the soil to dry out slightly between waterings. A general rule of thumb is to water once a week, but this can vary depending on the type of plant and the environment it’s in.
When watering, be mindful of the water’s temperature. If the water is too hot or cold, it can shock the plant and cause damage. Use room temperature water for the best results.
In addition to watering, make sure your plants are getting enough sunlight. Most plants need at least six hours of sunlight per day to thrive. If you’re keeping your plants indoors, place them near a window or invest in grow lights to ensure they’re getting enough light.
With proper care and attention, your plants will flourish in their new homes, and you’ll have a beautiful, sustainable decoration that brings life to any room.
Use Empty Peanut Cans as Art Supply Storage Containers
Label the cans with paint or permanent marker
If you plan to reuse empty peanut cans as storage containers for your art supplies, it’s important to label them clearly. You can use paint or permanent marker to write the contents of each can on the outside. This will help you keep track of what’s inside each can and prevent any confusion or accidental mixing of materials.
When labeling the cans, it’s best to use a font that is easy to read and bold enough to stand out. Avoid using small or cursive writing, as it may be difficult to read when the cans are stacked or stored in a dark area. Additionally, try to label the cans in a consistent way, such as using the same color or pattern for all the labels. This will make it easier to identify the contents of each can at a glance.
To make the labels more durable, you can use a clear coat of sealant over the paint or marker. This will protect the labels from wear and tear and ensure that they remain legible even after multiple uses.
Fill the cans with art supplies such as paintbrushes, pencils, or markers
Reusing empty peanut cans as storage containers for art supplies is a practical and creative way to keep your workspace organized. By filling the cans with paintbrushes, pencils, or markers, you can easily access and transport your art supplies while also keeping them protected from damage.
To start, clean out the peanut cans thoroughly to remove any remaining residue from the peanuts. Then, choose the art supplies that you want to store in each can. For example, you might want to store paintbrushes in one can, pencils in another, and markers in a third.
Once you have chosen the art supplies, fill the cans to the desired level. You may want to leave some space at the top of the can to allow for easy stacking or to prevent the contents from spilling out. If you are storing pencils or markers, you may want to insert them into the can vertically to save space.
Label each can with a sticky note or piece of masking tape to indicate what supplies are inside. This will make it easier to find the supplies you need when you are working on a project.
Reusing empty peanut cans as art supply storage containers is a great way to reduce waste and keep your workspace organized. Plus, the cans can be easily stacked or arranged to create a visually appealing display of your art supplies.
Store the cans upright for easy access and organization
One of the most convenient ways to reuse empty peanut cans is by converting them into storage containers for your art supplies. By storing the cans upright, you can easily access and organize your art supplies.
Here are some tips for storing the cans upright for easy access and organization:
- Use a sturdy surface: It is important to place the cans on a sturdy surface to ensure that they do not tip over and fall. A stable table or desk is the best option.
- Group similar supplies together: To make it easier to find what you need, group similar supplies together in separate cans. For example, you can put all your paintbrushes in one can, and all your paints in another.
- Label the cans: Labeling the cans with the contents inside will help you identify what is inside each can without having to open them. You can use a permanent marker to write the contents on the side of the can.
- Keep the lids tightly closed: To prevent the contents from spilling out, make sure the lids are tightly closed. This will also help to keep the contents organized and prevent them from drying out.
- Use dividers: To further organize the contents, you can use dividers to separate the different types of supplies. This will make it easier to find what you need and keep everything organized.
By following these tips, you can easily store your art supplies in empty peanut cans and keep them organized for easy access.
Stack the cans to create a wall-mounted storage unit
To create a wall-mounted storage unit, first, make sure that the peanut cans are thoroughly cleaned and dried. Next, remove the labels from the cans if they are still present. This can be done by soaking the cans in warm water with a bit of dish soap for a few minutes, then scrubbing off the residue with a non-abrasive sponge.
Once the cans are clean, you can begin stacking them. To create a sturdy structure, it’s best to use cans of the same size and shape. Start by stacking the cans in a pyramid shape, with the largest can at the bottom and the smallest can at the top. Make sure that each can is firmly attached to the one below it by inserting a piece of thin cardboard or foam core between the cans.
Next, attach a piece of strong wire or cable to the top of the pyramid for hanging. This can be done by attaching the wire to the center of the top can, then bending it into an “L” shape and attaching it to the wall. Make sure that the wire is securely attached to the wall and can support the weight of the cans.
Finally, use the remaining cans to fill in any gaps in the structure and add more storage space. You can also decorate the cans with paint or stickers to give the storage unit a personalized touch.
Create a Mini Herb Garden with Empty Peanut Cans
Cut the can in half horizontally
Reusing empty peanut cans can be a fun and practical way to create a mini herb garden. One of the simplest ways to do this is by cutting the can in half horizontally. This method is not only easy but also allows for the creation of multiple planters from just one can. Here’s how you can do it:
- Start by cleaning the peanut can thoroughly with soap and water to remove any residue from the inside.
- Using a sharp pair of scissors or a utility knife, cut the can in half horizontally along the seam.
- Carefully separate the two halves of the can to ensure that they are both even and symmetrical.
- Once you have separated the halves, use a pair of pliers to remove the lid and bottom of each half-can.
- You can now use the halves as planters for your herbs. Fill each half with soil and plant your herbs in the soil.
- Make sure to water the herbs regularly and place them in a sunny location to help them grow.
By cutting the peanut can in half horizontally, you can create multiple planters from just one can. This is a great way to reuse the can and also a fun way to grow your own herbs at home.
Fill the top half of the can with soil
Before filling the can with soil, it is important to make sure that it is clean and free of any residue from the peanuts. To do this, simply rinse the can out with water and let it dry completely.
Once the can is clean, it’s time to fill it with soil. You can use any type of soil that you have on hand, but it’s important to make sure that it is well-draining. This will help to prevent the soil from becoming waterlogged and will ensure that your herbs have the proper growing conditions.
To fill the can with soil, simply scoop some soil into the can and press it down firmly with your hands. Continue doing this until the top half of the can is filled with soil. You may want to add a layer of mulch on top of the soil to help retain moisture and suppress weeds.
Once the can is filled with soil, you can plant your herbs in it. Choose herbs that are suitable for your climate and that you enjoy using in your cooking. You can plant the herbs by digging small holes in the soil and placing the roots of the plants in the holes. Make sure to water the soil well after planting your herbs.
With a little care and attention, your empty peanut can will be transformed into a thriving mini herb garden that you can enjoy for months to come.
Plant small herb plants or seeds in the soil
Reusing empty peanut cans can be a fun and practical way to create a mini herb garden. By planting small herb plants or seeds in the soil, you can create a convenient and portable herb garden that can be placed on your windowsill or kitchen counter.
Here are some steps to follow:
- Remove the label from the peanut can and rinse it out thoroughly with water.
- Add a layer of potting soil to the bottom of the can.
- Plant small herb plants or seeds in the soil, making sure to follow the recommended spacing and planting depth for each herb.
- Water the soil and keep it moist until the seeds germinate and the plants begin to grow.
- Place the can in a sunny location or under grow lights, depending on the needs of the herb plants.
- As the plants grow, you can trim them back to keep them at a manageable size and harvest the leaves as needed.
By reusing empty peanut cans in this way, you can create a fun and functional herb garden that will not only add some greenery to your home but also provide you with fresh herbs for cooking and flavoring.
Place the bottom half of the can over the top half as a lid
If you’re looking for a creative way to grow your own herbs, consider repurposing those empty peanut cans. The cans can be used as a planter, and the bottom half can be placed over the top half as a lid to create a mini greenhouse effect. This method is ideal for growing small herbs such as basil, cilantro, and parsley. Here’s how to do it:
- Clean the cans thoroughly to remove any residue from the peanuts.
- Punch drainage holes in the bottom of the can using a nail or a drill.
- Fill the bottom half of the can with a well-draining potting mix.
- Plant your herb seedlings or small cuttings into the soil.
- Place the top half of the can over the bottom half, making sure it fits snugly. This will create a greenhouse effect, which will help retain moisture and heat around the herbs.
- Water the herbs regularly, keeping the soil moist but not waterlogged.
- Place the herb garden in a sunny location, such as a windowsill or a patio.
- Enjoy your fresh herbs!
By repurposing those empty peanut cans, you can create a convenient and attractive herb garden that will add some greenery to your home while also reducing waste.
Secure the lid with tape or glue
Transforming an empty peanut can into a mini herb garden is a clever and creative way to repurpose it. The first step in this process is to secure the lid with either tape or glue.
To secure the lid with tape, you will need to carefully cut a piece of tape that is slightly larger than the lid. Once you have your piece of tape, you should apply it to the underside of the lid, ensuring that it is firmly in place. This will prevent the lid from falling off and help to keep the soil in place.
Alternatively, you can use glue to secure the lid. To do this, simply apply a small amount of glue to the underside of the lid and allow it to dry. Once the glue is dry, the lid will be firmly in place and ready to use.
It is important to note that when securing the lid with either tape or glue, you should ensure that it is firmly in place but still able to be removed when necessary. This will allow you to easily access the herbs inside the can without damaging the lid or the plant.
In summary, securing the lid with tape or glue is an essential step in creating a mini herb garden with an empty peanut can. By carefully attaching the lid, you can ensure that the soil stays in place and the herbs grow successfully.
Repurpose Empty Peanut Cans as Trash Bin Covers
Before you can repurpose an empty peanut can as a trash bin cover, it’s important to remove the label from the can. This step is crucial because the label may be glued or otherwise attached to the can in a way that makes it difficult to remove. However, with a little bit of effort and patience, you can easily remove the label from the can.
Here are the steps you can follow to remove the label from the can:
- Start by running warm water over the label. This will help to loosen the glue or adhesive that is holding the label in place. Let the water sit on the label for a few minutes to soften it.
- Next, use a flathead screwdriver or a butter knife to gently pry the label off the can. Start at one corner of the label and work your way around the can, using the screwdriver or knife to loosen the label as you go.
- If the label is particularly stubborn, you may need to use some elbow grease to get it off. Use a cloth or sponge to scrub at the label until it comes off.
- Once the label is removed, rinse the can off with warm water and soap to remove any residue.
By following these steps, you should be able to easily remove the label from the peanut can, making it ready for repurposing as a trash bin cover.
When repurposing empty peanut cans as trash bin covers, the first step is to cut the can in half horizontally. This is an essential step in creating a cover that will fit securely over the trash bin.
To cut the can in half horizontally, you will need a sharp pair of scissors or a utility knife. Start by using the scissors or knife to make a small puncture in the top of the can, about an inch from the edge. Then, carefully cut along the side of the can, working your way down to the bottom.
Once you have cut the can in half horizontally, you will have two equal halves that can be used as a cover for a trash bin. Make sure to clean any sharp edges with a fine-grit sandpaper to avoid any injuries.
By cutting the can in half horizontally, you can easily create a custom-sized cover for your trash bin that will fit securely and keep the contents inside.
Fit the can over the opening of a trash bin
Reusing empty peanut cans as trash bin covers is a simple yet effective way to add an extra layer of protection against odors and insects. Here’s how you can do it:
- Remove the label from the peanut can, if possible. This will make it easier to fit the can over the trash bin.
- Cut a hole in the lid of the can that is slightly smaller than the opening of the trash bin. This will create a snug fit and prevent any spills or leaks.
- Place the can over the opening of the trash bin. The hole in the lid should be positioned directly over the opening of the bin.
- Use some strong adhesive, such as duct tape or epoxy, to secure the can in place. Make sure the adhesive is strong enough to hold the can securely over the opening of the bin.
- Finally, fill the trash bin with the appropriate waste, and you’re good to go! The empty peanut can will keep the contents contained and prevent any unpleasant odors from escaping.
Secure the can to the bin with tape or glue
To secure the empty peanut can to the trash bin, you can use either tape or glue. Both options are easy to use and will provide a strong bond between the can and the bin.
Tape
Tape is a quick and easy option for securing the empty peanut can to the trash bin. You can use any type of strong tape, such as duct tape or packaging tape. Simply wrap the tape around the edges of the can and press it onto the bin. This will create a secure bond that will hold the can in place.
Glue
Glue is another option for securing the empty peanut can to the trash bin. You can use a strong glue, such as a construction adhesive, to bond the can to the bin. Apply the glue to the edges of the can and press it onto the bin. Allow the glue to dry completely before using the trash bin. This will create a strong bond that will hold the can in place.
By using tape or glue to secure the empty peanut can to the trash bin, you can ensure that it stays in place and doesn’t move around. This will make it easier to use the bin and keep your trash contained.
Replace the can with a new one as needed
Reusing empty peanut cans as trash bin covers is a clever way to keep your garbage contained while also giving them a new purpose. By using the cans as trash bin covers, you can easily replace them with new ones as needed. This is a great way to ensure that your trash bins are always clean and fresh, and it also helps to keep your garbage contained.
One of the benefits of using empty peanut cans as trash bin covers is that they are durable and sturdy. This means that they can withstand the weight of the garbage inside, and they will not easily collapse or break. Additionally, they are also easy to replace when they become dirty or damaged.
Another benefit of using empty peanut cans as trash bin covers is that they are cost-effective. Rather than buying new trash bin covers, you can simply reuse the empty peanut cans that you already have. This can save you money and help to reduce waste.
When it comes time to replace the empty peanut cans with new ones, you can easily do so by simply removing the old can and replacing it with a new one. This is a quick and easy process that can be done in just a few minutes. Additionally, you can also clean the old can before replacing it with a new one, which will help to keep your trash bins clean and fresh.
Overall, using empty peanut cans as trash bin covers is a clever and cost-effective way to keep your garbage contained. By replacing the cans with new ones as needed, you can ensure that your trash bins are always clean and fresh.
Use Empty Peanut Cans as Bird Feeders
Drill small holes around the top of the can
If you’re looking for a way to turn those empty peanut cans into something useful, why not use them as bird feeders? By drilling small holes around the top of the can, you can create a unique and functional birdhouse that will attract birds to your yard.
Here’s how to do it:
- Clean the can thoroughly to remove any residue from the peanuts.
- Use a drill to make small holes around the top of the can, making sure not to make them too large as this could harm the birds.
- Sand the edges of the holes to create a smooth surface.
- Apply a sealant or paint to the can to protect it from the elements.
- Place the can in a sunny spot in your yard and fill it with birdseed.
With these simple steps, you can create a birdhouse that will provide a cozy home for birds and add a touch of nature to your yard.
Fill the can with birdseed or other bird food
Reusing empty peanut cans as bird feeders is a creative and practical way to attract birds to your backyard. By filling the can with birdseed or other bird food, you can easily convert it into a bird feeder that will attract a variety of birds. Here are some steps to follow:
- Clean the can thoroughly: Before filling the can with birdseed or other bird food, make sure to clean it thoroughly. Remove any labels or residue from the can, and rinse it with soap and water. This will ensure that the birdseed or other bird food does not become contaminated.
- Choose the right birdseed or other bird food: There are many types of birdseed and other bird food available, including sunflower seeds, safflower seeds, and peanuts. Choose a type of birdseed or other bird food that is appropriate for the birds in your area. You can also consider adding other items such as suet or dried fruits to the birdseed or other bird food.
- Fill the can with birdseed or other bird food: Once the can is clean and you have chosen the right birdseed or other bird food, it’s time to fill the can. Fill the can to the top with birdseed or other bird food, leaving enough room at the top for birds to access the food.
- Hang the bird feeder: Once the can is filled with birdseed or other bird food, it’s time to hang the bird feeder. You can hang the bird feeder from a tree branch or a hook, making sure that it is secure and in a location that is easily accessible to birds.
By following these steps, you can easily convert an empty peanut can into a bird feeder that will attract a variety of birds to your backyard.
Hang the can from a tree or pole
To create a bird feeder using an empty peanut can, the first step is to clean the can thoroughly. This can be done by washing it with soap and water, or by using a vinegar and water solution to remove any residue.
Once the can is clean, the next step is to create holes in the can. This can be done using a nail or a drill, and the holes should be large enough for birds to perch on and access the food inside.
After the holes have been created, the next step is to fill the can with bird seed or other bird-friendly food. It’s important to make sure that the food is fresh and not expired, as this can attract unwanted pests.
Once the can is filled with food, the final step is to hang it from a tree or pole. This can be done using a piece of string or rope, and the can should be suspended at a height that is easily accessible to birds.
By hanging the can from a tree or pole, the bird feeder is easily accessible to birds and can help attract a variety of bird species to your yard or garden. Additionally, the peanut can material provides a natural and rustic look that can enhance the aesthetic appeal of your outdoor space.
Enjoy watching the birds feed
Transforming empty peanut cans into bird feeders is a clever way to repurpose them while enjoying the delightful sight of birds feeding. Here’s how you can do it:
- Clean the cans thoroughly: Before you proceed, make sure to clean the cans thoroughly with soap and water to remove any residue.
- Drill holes for the birds: Use a drill to create small holes around the can’s rim. This will serve as perches for the birds as they feed. Ensure the holes are evenly spaced and not too large, as this will prevent the seed from spilling out.
- Add birdseed: Fill the cans with birdseed, leaving enough space at the top for the birds to access the seed. You can use a funnel for this purpose.
- Hang the feeders: Once the cans are filled with birdseed, you can hang them from trees or hooks. Ensure they are securely fastened so they don’t fall, and place them in an area where birds frequently visit.
- Enjoy the show: After setting up the bird feeders, find a comfortable spot to sit back and enjoy the birds feeding. This activity is perfect for unwinding and appreciating nature’s beauty.
By transforming empty peanut cans into bird feeders, you not only reduce waste but also create a unique and entertaining way to enjoy the outdoors.
Create a Fun Game with Empty Peanut Cans
Removing the label from the peanut can is an essential step in transforming it into a game piece. Here are the steps to follow:
- Carefully peel off the label from the can using your fingers or a label remover. Be cautious not to damage the can or the paint.
- Once the label is removed, wash the can thoroughly with soap and water to remove any residue.
- Dry the can completely before using it for the game.
Removing the label from the peanut can is a crucial step in creating a fun game piece. By following these simple steps, you can easily transform an empty peanut can into a unique game piece that will keep your family and friends entertained for hours.
Paint or decorate the can with a target or other game-related design
To paint or decorate the empty peanut can, start by cleaning it thoroughly with soap and water to remove any remaining residue. Once it’s clean, use a can of spray paint or acrylic paint to cover the entire surface of the can. Choose a bright color or a fun pattern that will stand out, and be sure to paint the entire surface evenly.
Once the paint has dried, use a marker or paint to add a target or other game-related design to the can. You could also add scoring areas or other elements to make the game more challenging. If you want to make the game even more interactive, add stickers or decals that show the scoring areas or other elements of the game.
Finally, once the design is complete, fill the can with small balls or other objects that will fit inside. These will be used as the “peanuts” in the game. You can then set up the can at a distance and use it as a target for a fun game of toss. The player who scores the most points by hitting the target wins the game.
By painting or decorating the empty peanut can with a target or other game-related design, you can turn it into a fun and interactive game that the whole family can enjoy. Plus, you’ll be giving an old object a new purpose, which is always a good idea.
Fill the can with small items such as coins or beads
Add some excitement to your life by turning an empty peanut can into a fun game! Here’s how:
- Collect small items: Gather a variety of small items such as coins, beads, or buttons that can fit inside the peanut can.
- Fill the can: Carefully fill the peanut can with the small items you’ve collected. Make sure to pack them in tightly so they don’t spill out easily.
- Create rules: Set up some rules for the game. For example, you could challenge your friends to see who can remove the most items from the can in a certain amount of time. Or, you could make it a contest to see who can fit the most items inside the can.
- Add a challenge: To make the game even more challenging, you could add a time limit or a penalty for dropping items. You could also add obstacles such as having to remove items with your eyes closed or using only your feet.
- Enjoy the game: Once you’ve set up the rules and added any desired challenges, it’s time to start playing! Gather your friends and family, and see who can master the game.
With a little creativity and some small items, you can turn an empty peanut can into a fun and exciting game that everyone can enjoy!
Attach a string to the top of the can and hang it on a wall
- Hanging the empty peanut cans on a wall can create a fun game for kids and adults alike.
- The string attached to the top of the can can be used to swing the can back and forth, creating a game of balance and coordination.
- This game can be played alone or with others, and can be modified to increase the difficulty level.
- For example, players can try to swing the can in a circular pattern around their head, or try to balance the can on their nose as they swing it back and forth.
- The possibilities are endless, and this game can provide hours of entertainment for those looking for a fun way to reuse empty peanut cans.
Play the game by trying to toss a small object into the can
Are you looking for a fun and unique way to reuse those empty peanut cans? Look no further! One creative idea is to turn them into a game.
To play, find a small object that you can easily toss, such as a penny or a small toy. Stand a few feet away from the can and try to toss the object into the can. You can make the game more challenging by placing the can at different distances or by adding obstacles.
Not only is this game a great way to reuse those empty peanut cans, but it’s also a fun activity for both kids and adults. So, grab some empty peanut cans and get ready to play!
FAQs
1. What can I do with empty peanut cans?
There are many things you can do with empty peanut cans! Here are ten clever ways to reuse them:
1. Storage: Empty peanut cans can be used to store other items such as nuts, bolts, or small tools. The sturdy construction of the cans makes them ideal for storing heavy or sharp objects.
2. Crafts: You can turn empty peanut cans into unique crafts. For example, you can make a wind chime by attaching strings to the bottom of the cans and hanging them from a tree. You can also use the cans as a base for creating other crafts, such as a vase or a lamp.
3. Recycling: If you’re environmentally conscious, you can recycle the empty peanut cans. Many communities have recycling programs that accept metal cans, so be sure to check with your local program to see if they accept peanut cans.
4. Cooking: Empty peanut cans can be used in cooking and baking. You can use them to store ingredients such as flour or sugar, or you can use them to make homemade chicken feeders or planters.
5. DIY Projects: There are many DIY projects that you can do with empty peanut cans. For example, you can turn them into a pencil holder, a planter, or a vase. You can also use them as a base for creating other DIY projects, such as a birdhouse or a picture frame.
6. Gardening: Empty peanut cans can be used in gardening. You can use them to make homemade birdhouses or bat houses, or you can use them as a base for creating other garden decorations.
7. Sensory Play: If you have young children, you can use empty peanut cans for sensory play. Fill them with sand or rice and let your children explore and play with them.
8. Travel: You can use empty peanut cans to store travel items such as toothpaste or sunscreen. The sturdy construction of the cans makes them ideal for traveling.
9. Gifts: Empty peanut cans can be used as gift containers. Fill them with treats such as nuts or candy and give them as gifts to friends and family.
10. Fundraising: If you’re involved in a fundraising campaign, you can use empty peanut cans as a way to collect donations. Fill them with change or small bills and set them out for people to donate to your cause.